 Creating a online payment form can be quite the task depending on your level of technical expertise.
In the same breathe, they can save you so much time by having them in place and setup correctly. An online payment form serves as an open door from your customer’s wallet to your bank account.
It allows you to be ready and stay ready to receive payments online at any given moment.
Here’s how to to it in Office Autopilot…
The Basic Flow
Creatng an online payment form in Office Autopilot (OAP) requires 3 steps
- Create a product
- Create an order form
- Create a sales page
You will want to make sure you have your sequences setup, tags, and action response rules setup before hand so you can effectively track your new customers.
Create A Product
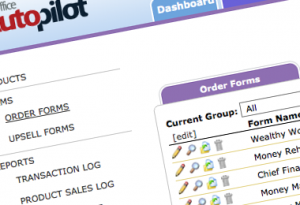
To create a product login to your OAP account and (1) Select the “Sales” tab. Then click on the (2) “Products” link to the left of the screen and choose (3) “New Product”

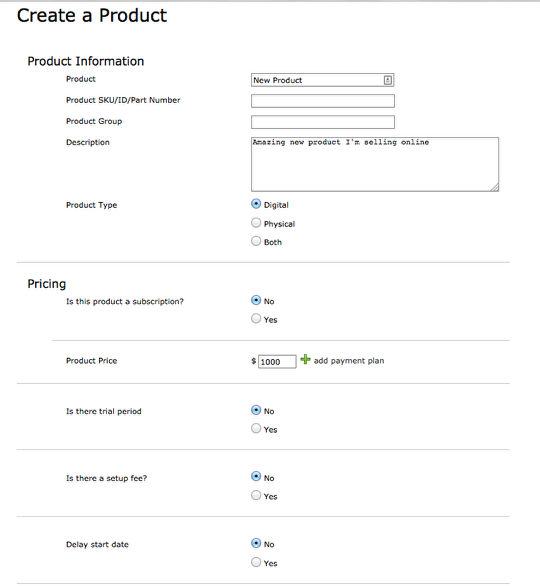
Configuring Your Product (Part 1)
Configure your product accurately. As you can see from the screenshot, there are a lot of pricing options available to you to setup the pricing pretty much however you like.
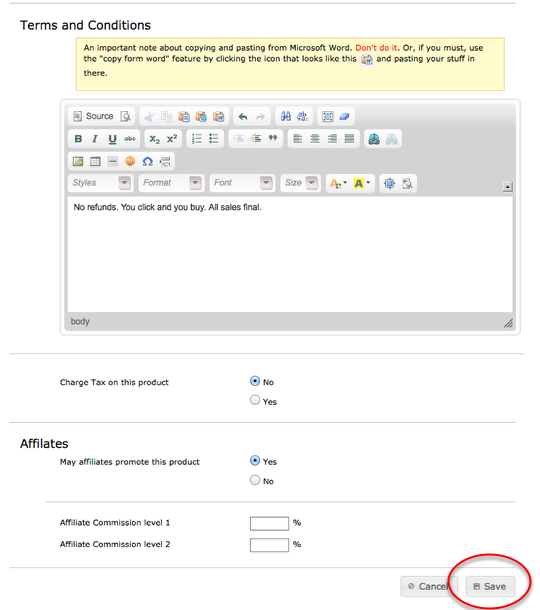
Configuring Your Product (Part 2)
Scrolling down in OAP will bring you to the next set of options. Here is where you can set product specific Terms and Conditions. Review the rest of the settings and adjust them to your liking and hit “Save”
Create Order Form
Next you will need to (1) click on the “Order Forms” link on the left side navigation and select (2) “New Order Form”.

Configuring Your Order Form (Part 1)
You can see the basic product fields for your new order form. Lets give some attention to the two fields below the basic configuration.
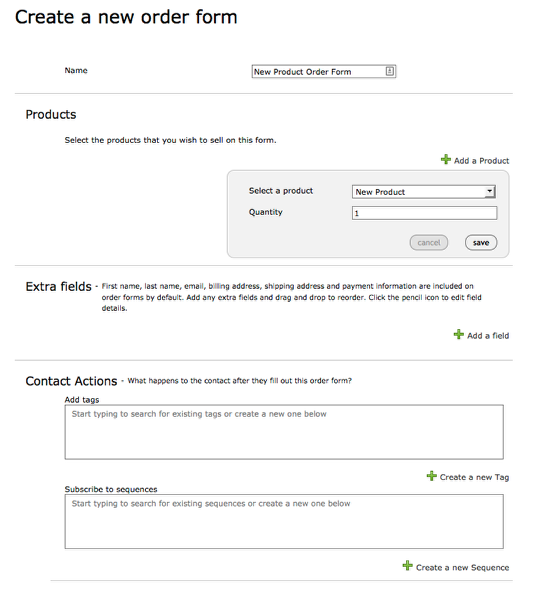
Extra Fields
As you can see OAP will automatically include all the fields required for processing a payment. However, if you wanted to have additional fields on your checkout form here is where you would do it.
Contact Actions
Here’s where we get a little deeper into the automation side of things. The contact actions are the reason I mentioned to have your sequences and tags already setup before you create your payment form.
As you can see you can tag or add your new customer to an existing sequence. This kind of functionality is powerful when it comes to follow-up marketing to understand what kind of complimentary products you may want to offer.
Configuring Your Order Form (Part 2)
Scroll down to the next set of options. Pay close attention to the top two rule boxes. In OAP you can have certain actions take place upon a successful transaction as well as a declined transaction. A good example would be to redirect them to a Paypal link if you are unable to process their card with your merchant account.
Under the action response rules you see the rest of the form configuration options.
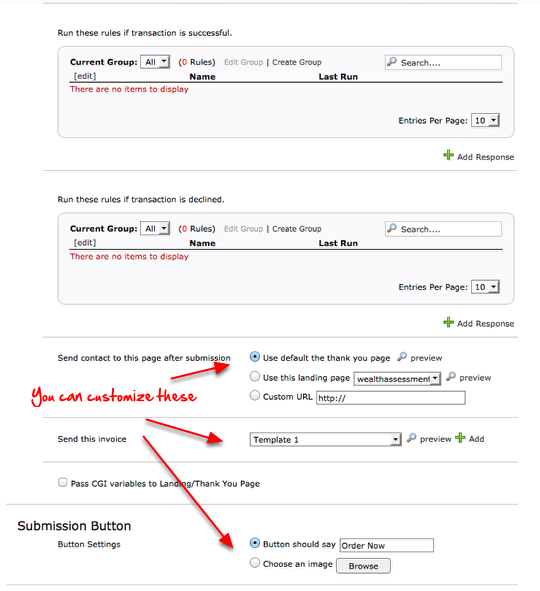
Configuring Your Order Form (Part 3)
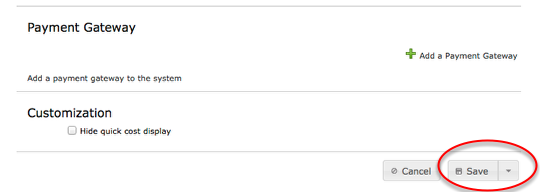
Add your Payment Gateway (how you will process the payment) and hit “Save”.
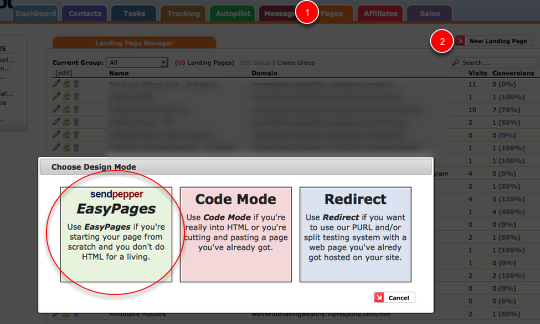
Creating Your Sales Page (Part 1)
Next click on the (1) “Pages” tab and select (2) “New Landing Page”. A lightbox will appear with 3 options to build your new sales page. For the sake of ease select the “EasyPage” option.
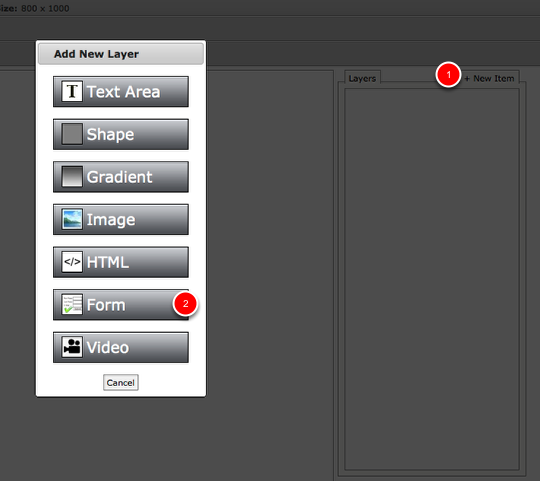
Creating Your Sales Page (Part 2)
On the new blank canvas select (1) “+ New Item” from the right sidebar. When the lightbox appears select (2) “Form”
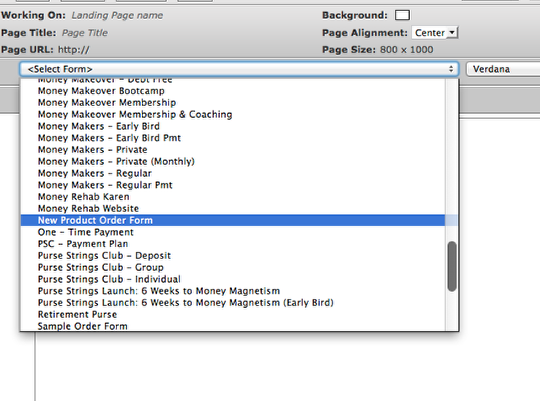
Creating Your Sales Page (Part 3)
Once the form has been added to the right sidebar you will see a “<Select Form>” option appear under the Page URL. Click on the drop down to access the payment form you just created.
NOTE: This drop down ONLY appears when you have added a form. If you don’t see this drop down option review the previous step and ensure you have completed it correctly.
Creating Your Sales Page (Part 4)
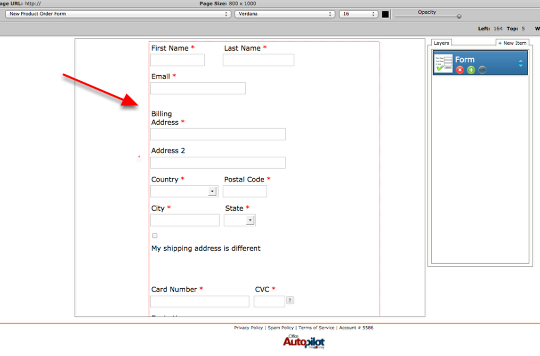
Your newly created payment form is now embedded on your new sales page. Feel free to add your branding graphics and any other design elements to make your payment page match your website the closest.
To publish the page you can use your own hosting domain and use a secured domain supplied by OAP.
Congratulations! You are now ready to create as many online payment forms as your heart desires and your business needs.